
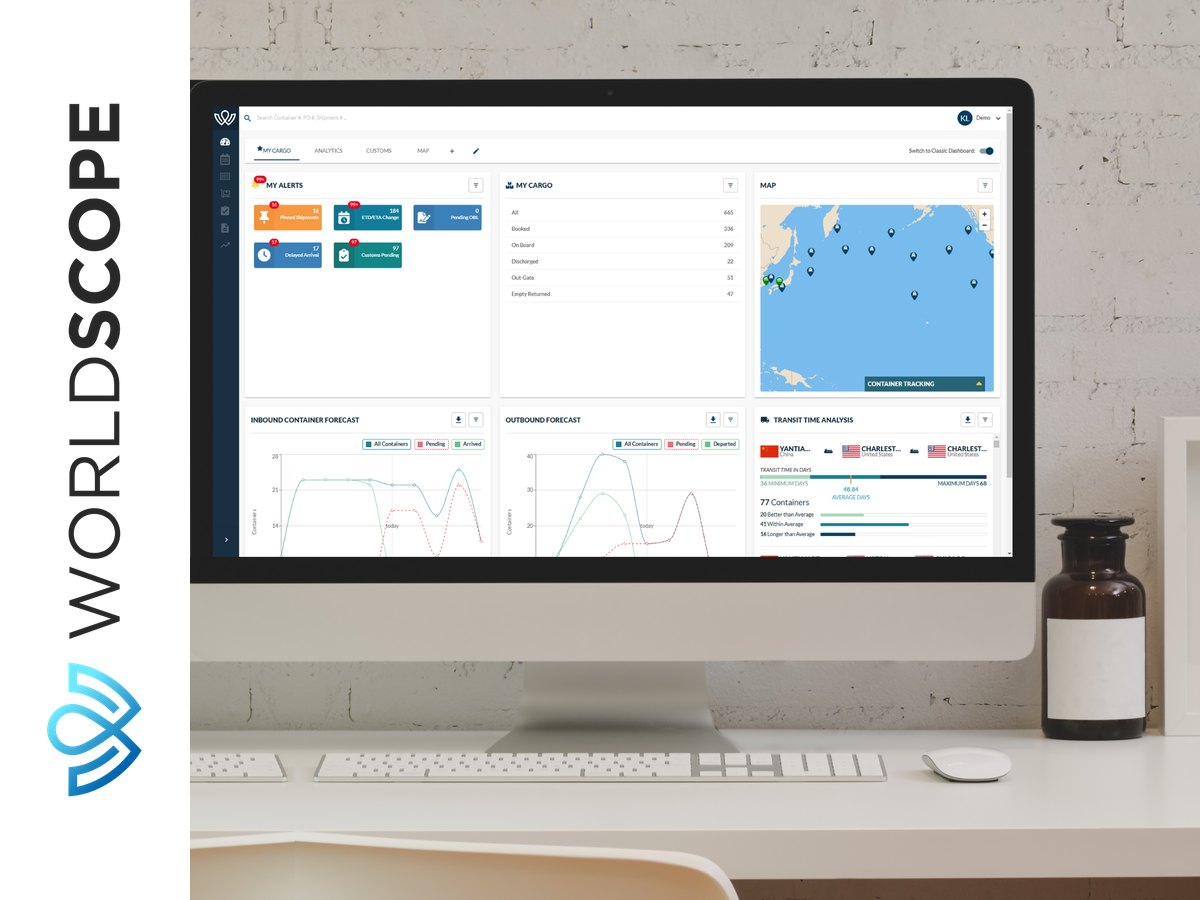
Analytics Dashboard
In the Analytics Dashboard, you have access to Transit Time Analysis, Container Utilization, and Finance.
Customize Your Analytics
You can add or remove widgets, move them around, and edit the names.
Report Management
Get the Supply Chain Data You Need with Reports
Reports can be scheduled, turned off, or run ad hoc from the Report Management page. To temporarily turn off a report, toggle the Scheduled switch. To manage a report, use the options available from the report row.
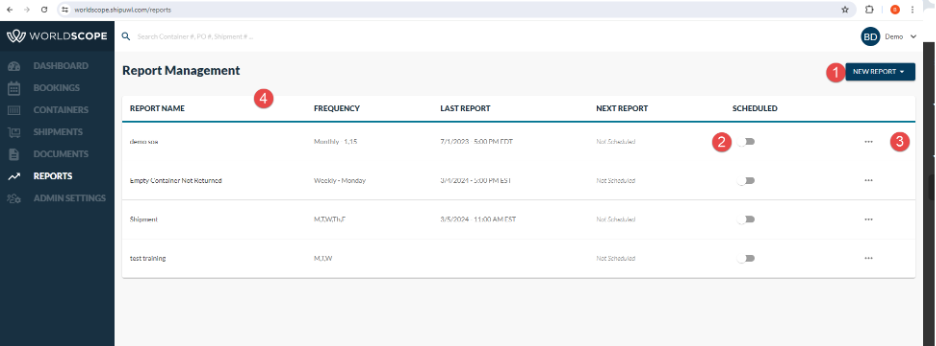
Manage Reports
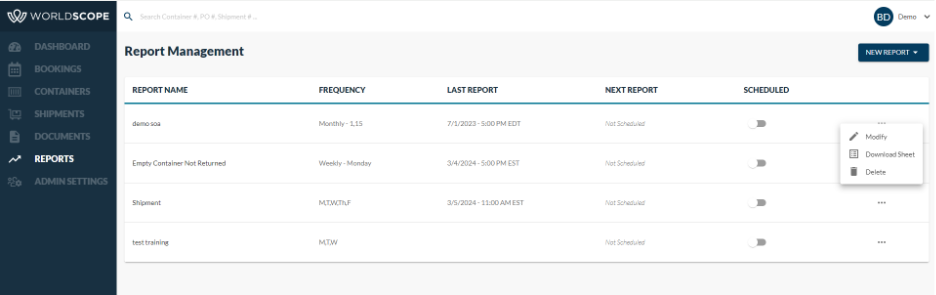
To Modify, Delete or Download a report click the ellipsis (…) at the end of the line.
Modify Reports
You can change an existing report by clicking the Modify option. It will bring you to Edit Report Screen. Follow the instructions under the Create New Report Section of this guide.
Report Templates
If you have saved templates created in your Admin Settings, select From Template and then select the templates created for your organization.
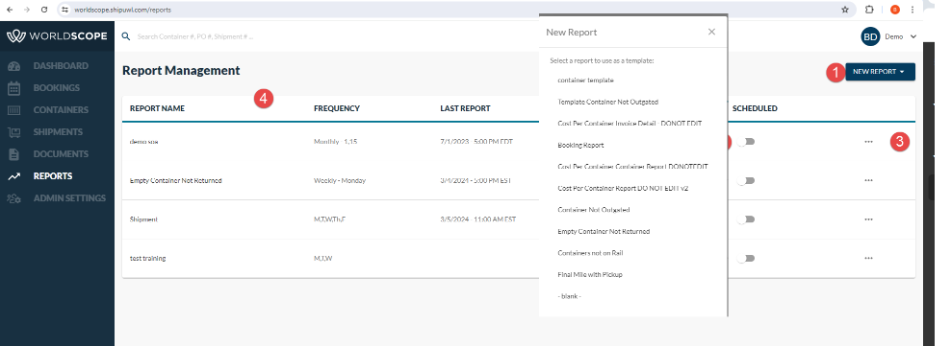
Create a New Report
Click on New Report. If you have templates already save, click on templates. If you do not, click from blank.
The New Report Wizard will open. Fill in all the fields and the next button will activate.
Name your Report
Select Report Type from the Drop Down.
Select when you want it to be emailed - Weekly you can select all days of the Week and Monthly - you can select day of the month. It is suggested for Month End Reports to select 1st of the month and time as 12:00AM
You can also select your time zone from the drop down.
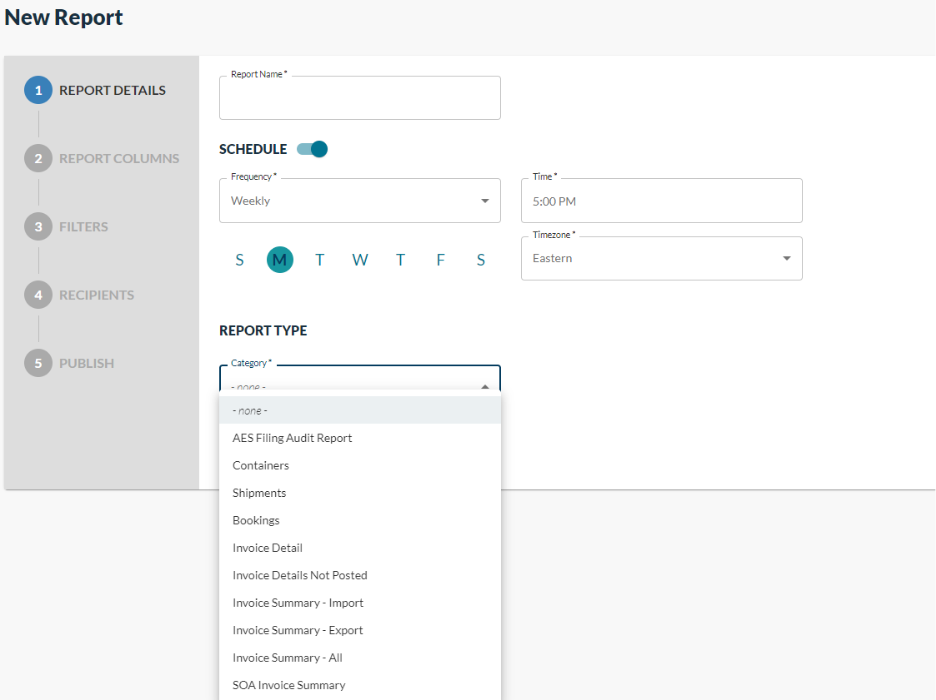
Once you complete Page 1 - Report Details, click Next.
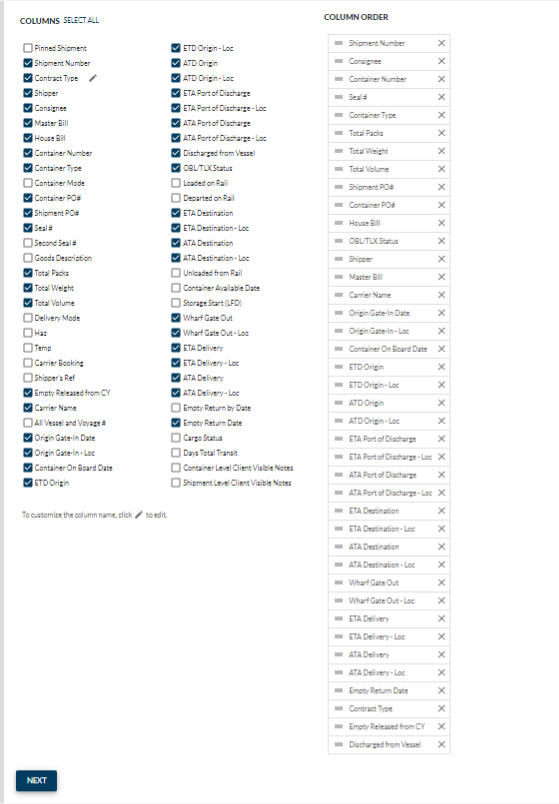
Page 2 - Select Columns
This page allows you to select what data you want, rename any data so match your Company Lingo and put them in the order you want to see them in your report
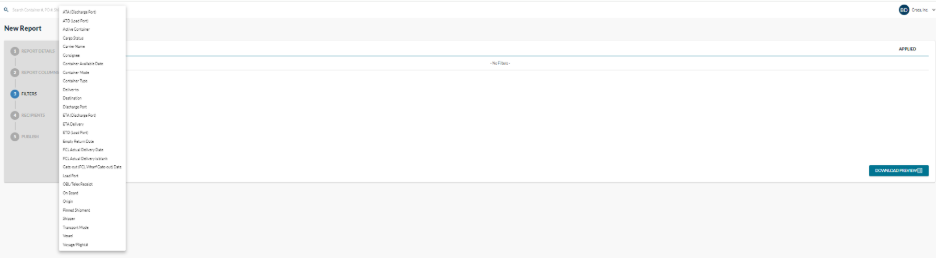
Page 3 - Filters
We suggest you filter reports for Active - This is controlled in your Admin Settings. Fall Off for FCL is defaulted at 10 days after Empty Return and LCL at 10 days after Delivered Date.
You can also download a test copy to make sure you get what you need.
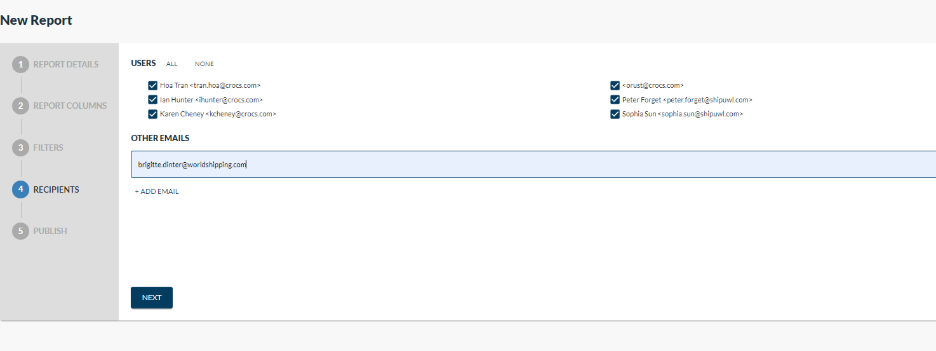
Page 4 - Recipients
On page 4 you will see all users attached to your account and can select any of them.
You can also add any email addresses for those parties you want to send the reports that do not have a log into WorldScope.
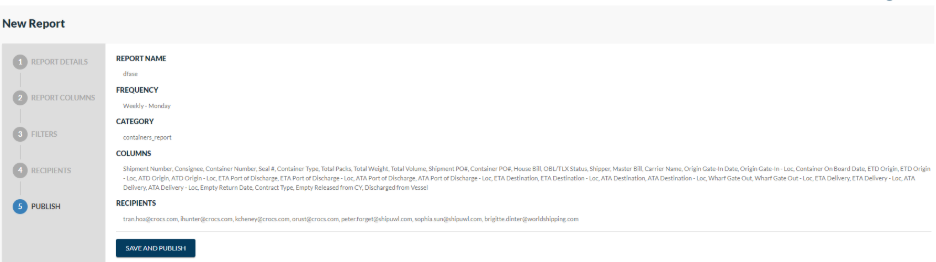
Page 5 - Save and Publish
Once you have completed the report, you can go to the last page. This page will show all your report settings. If you want to go back, just click the page you want to go back to and repeat.
Create a Report Template
Create templates to help you manage your reports.
Create a Report from a Template
Use templates to create new reports.
Create a New Report